Applied Quantitative Methods
Structure data, build models, and plot results in the R programming language

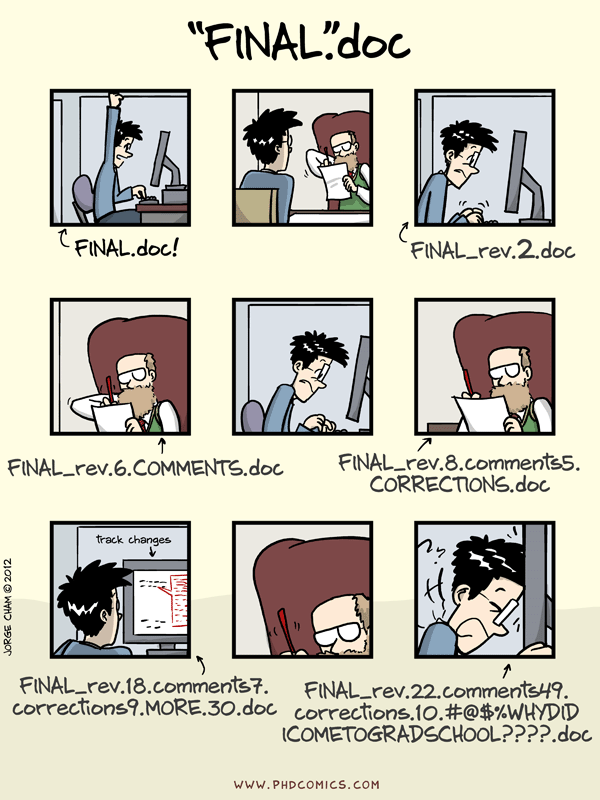
The purpose of this lesson to provide a minimum use case of how to link Rstudio, git, and GitHub. I also provide links down below to lessons that demonstrate how to use git from the command line.
To complete the GitHub portion of this lesson you will need to create a GitHub user account: https://github.com/
Git is a version control system that allows you to track changes to your data and source code as you develop quantitative projects. It is common when working on a project to accrue many different versions of data and code files. git provides a system of organizing these file versions into a powerful reference system.
Note: Mac users you may already have git installed on your OS.
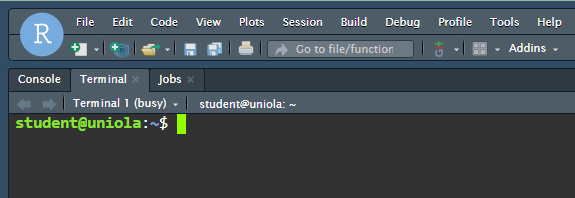
Open your terminal and type git and see if you get an error.
Note: some Mac users have found these step-by-step install instructions helpful https://codeburst.io/installing-git-for-the-first-time-on-mac-osx-bf9c513af2b8
For most Rstudio will automatically figure out where git is located, but for others you will need to do this manually. Follow these steps
C:\Program Files (x86)\Git\binYou will need to configure your git user name the first time you use it on a machine. This is a pretty simple process.
$ git config --global user.name "Mona Lisa"
$ git config --global user.email "mona@gmail.com"
$ git config --list
Output
user.name=Mona Lisa
user.email=mona@gmail.com
GitHub continues to change its user policies and authenication methods on a yearly basis. Currently (2023) there are several setps that you need to complete to make sure you can log in and remotely push code to github.
cd ~/.sshssh-keygen -ocat ~/.ssh/id_rsa.pubCongratulations! If you’ve made it this far you have successfully configured Rstudio, git, and github - no small accomplishment! Now we’re ready to start doing work with these tools in concert. Each tool has a different role:
The standard workflow that we will work though now is:
a. create a repo on GitHub with a blank README.md file for a new project that you want to undertake
b. clone (i.e., download) the repo to your local machine using Rstudio Project interface
c. make changes to repo by adding code and data
d. commit your changes locally
e. push (i.e., upload) your changes to GitHub via Rstudio GUI
f. repeat steps d and e as needed.
Note: if you make any changes to the GitHub repo either on another machine or in the web browser then you’ll want to “pull” those changes down to your local machine you’re working on before making new local changes. Failure to do this will result in files that are not-synced up. If you use dropbox this is called a conflicted copy - two versions of a file but the software isn’t sure which is the version that is most appropriate.
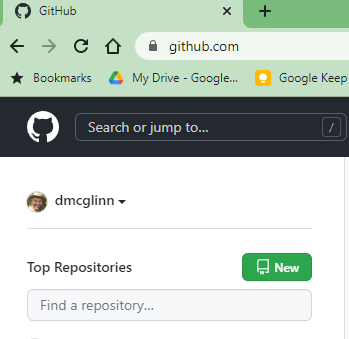
Good news you just got funded to study longleaf pine forests - time to setup a new github repo to kick off the project.
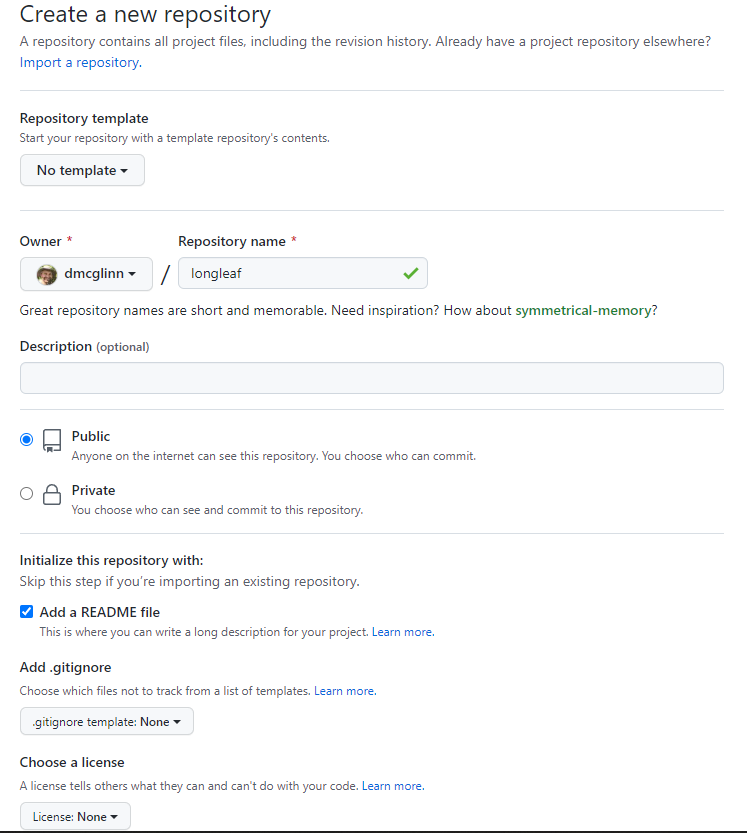
Be sure to click “Add a README file” - this makes things easier downstream
Click green button “Create repository”
Now that you have created your new repo you’ll need to clone it to your local machine so you can start adding data and code to it.
Click the Green button called “<> Code”
What you chose next will depend on if you chose to work with personal access
tokens or the ssh key for authentication into github.
i. personal access token -> “HTTPS” option
ii. ssh -> “SSH” option
Click the little window button next to the url this will “copy” that url to your clipboard.
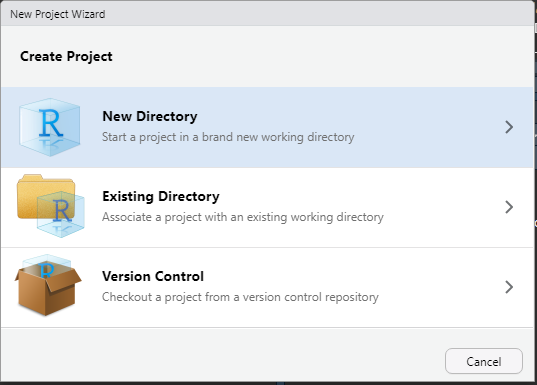
On your local machine open Rstudio and click:
File -> New Project
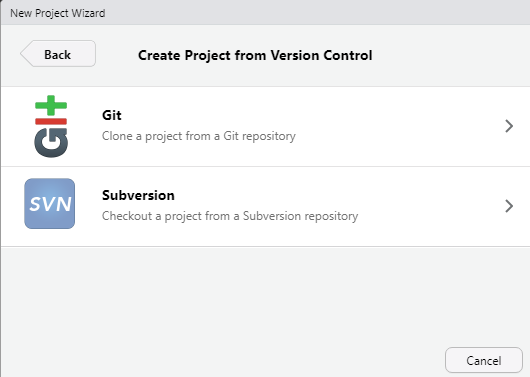
When the next window pops up chose “Version Control”
Then chose “Git”
Now paste in the url for the github repo (that you have on your clipboard) into the box for “Repository URL:”
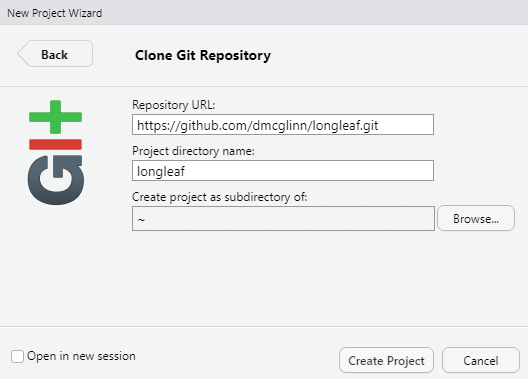
Click “Create Project”
You’ve just cloned your first repo!
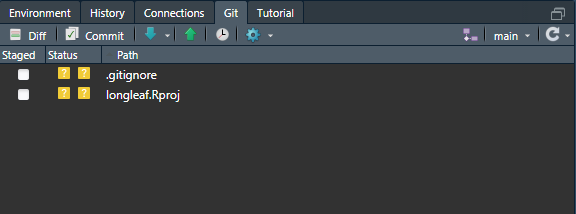
You’ll now notice in Rstudio you have a little tab called “Git”
Now is where we get to work. The first thing we probably want to do
is provide our project with a better description in our README.md file.
Open that file in Rstudio and type a description of the project and save the file.
You will notice that in Rstudio’s Git tab has changed slightly as the file
README.md will have a blue M next to it in the status column.
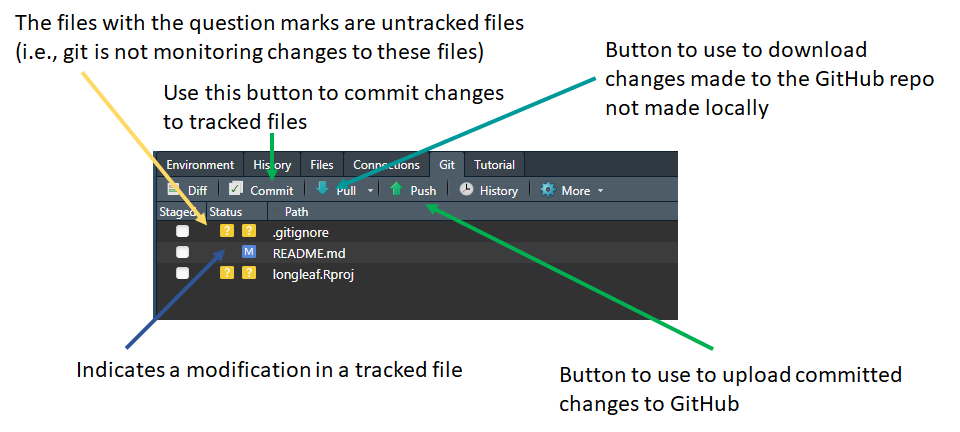
This is different than the “?” that accompany the .gitignore and .Rproj files. Those files are not ‘tracked’ by git meaning that it does not monitor those files for changes. These files were auto generated when you created the version control Rstudio project. In general, best practices suggest not to track either of these files.
Now we can examine our changes by clicking the “Diff” button which will bring up the following window:
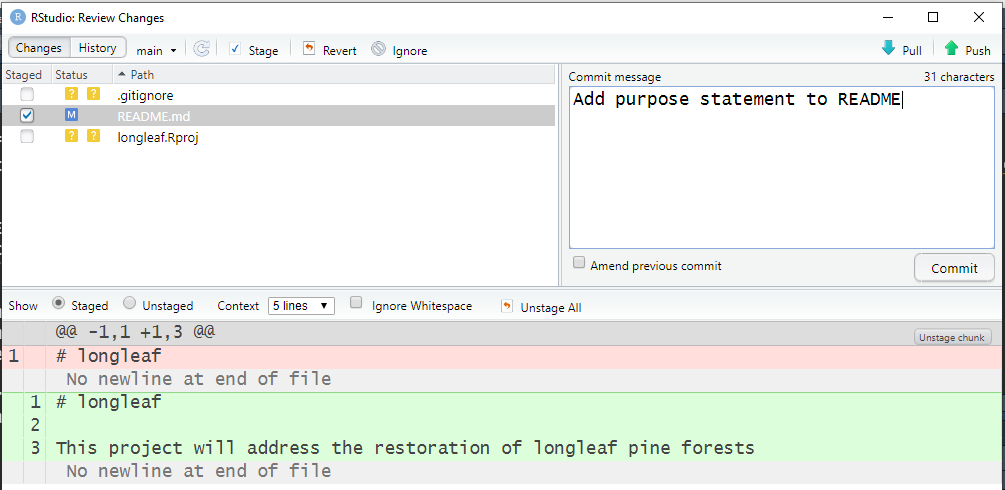
If those changes look good then simply add a commit message in the top right.
A few pointers on good commit messages:
Now that we have commited a change to our repo we can “Push” these changes to GitHub so they show up on the internet.
Simply click the “Push” button. If you configured “HTTPS” then you will be prompted for your GitHub user name and your password. Note password refers to your personal access token in this case. If you setup “SSH” then the commit should go through without having to do anything.
You’ve mastered the basic workflow at this point so you can make new changes
to your repo. You can add data or code or more detailed description of the
project on the README.md file.
As you make changes to your files and commit those changes you will be ever increasing the length of the git log or history. This can be examined either on github under commit history or in Rstudio by clicking the clock icon on the git tab.
Note that it is not necessary to Push your code after every commit. Typically I just push changes when I’m done with a work session or just finished a task.
Now is a good time to review the functionality of the buttons on the git tab in Rstudio:
The above instructions walked you through how to use git using the Rstudio GUI, and for 90% of your workflow that will be sufficient. Sometimes it will be necessary to use the command line (i.e., the terminal) to issue git commands. If you want to learn how to do that please work through the SWC lesson on Git Version Control with Git
In particular focus on:
If you setup an Rstudio project in a directory that was not a git directory then Rstudio will not recognize that it is a git directory until you create the Rstudio project. This is not difficult just follow the instructions for “Using Git from Rstudio” which is above.
It is a good idea that you ensure that you have a text editor that can be run
from the terminal. Newer installs of git ship with an editor called nano
In the bash terminal type nano and hit Enter.
If this does not bring up a text editor window in the terminal then you will
need to reinstall git and chose to use the nano editor for commit messages. Alternatively you can download nano directly from here:
http://www.nano-editor.org/dist/v2.2/NT/nano-2.2.6.zip
Unzip the file and paste the files that have either a .exe or .dll extension
in the directory: C:/Windows/System32/
If none of the files appear to have a .exe file ending look for the file called
nano (this also indicates to me that you must have the default windows
option of hiding file extensions active - go turn it off when you get a chance).
Restart the terminal and try the command winpty nano test.txt If everything
is working this will create a file called test.txt in your working directory
for you to edit within the terminal.
If that still does not work not to fret you can always use the native text editor
on Windows called notepad.
In the terminal simply type notepad test.txt to create a text file called
test.txt for you to edit in a GUI interface (i.e., not within the terminal window).
Hit Cntrl - c at the terminal command prompt to close notepad.
Your OS may ship with the nano text editor. To examine if it is already
functional on your machine. Open the terminal and type nano and hit Enter.
If is is not installed then I recommend you try Text wrangler:
http://www.barebones.com/products/textwrangler/
https://swcarpentry.github.io/git-novice/02-setup/
